Maintaining my Neco Abruzzi

Introduction


Service a neco abruzzi scooter - preparation
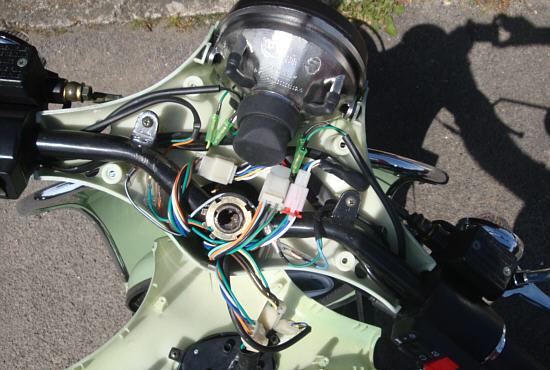
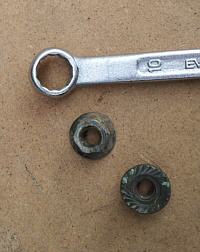
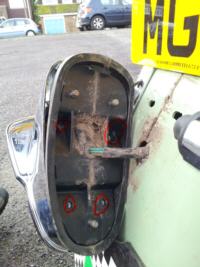
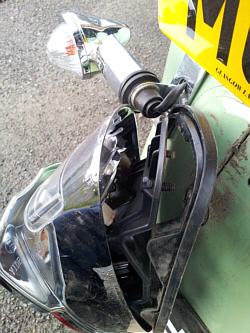
Sales outlets for the Neco are few and far between. That means unless you are lucky, the bike will need to be delivered by courier. 
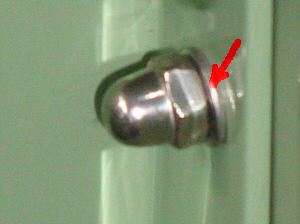
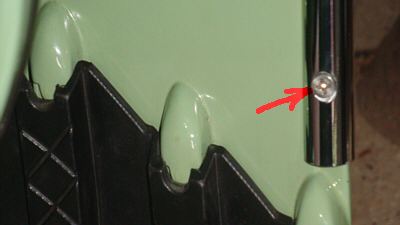
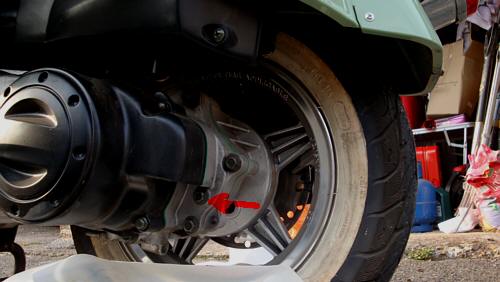
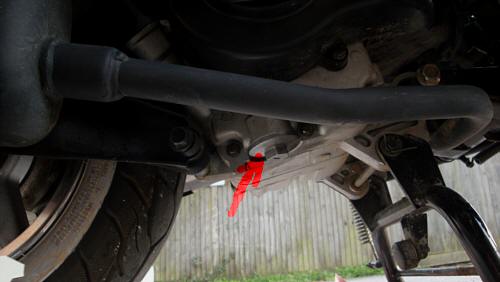
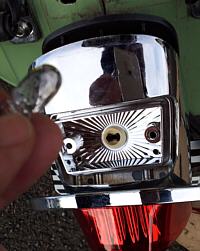
It also means that dealing with any teething troubles will be down to you. On delivery one screw was missing and a nut and bolt was lost soon after. I understand this is not uncommon on Chinese and some Italian scooters. Luckily it's the trim that 
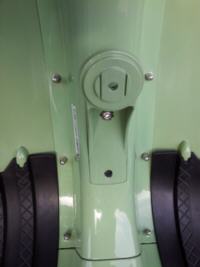
works loose I'm told and not the more important parts like wheel nuts! Therefore my first job was to buy a tube of "locktight lock and seal" and apply it to all the nuts that look vulnerable. The section below provides some details


Nuts and screws


Service a neco abruzzi scooter - washers Service a neco abruzzi scooter - screws Service a neco abruzzi scooter - screws
I found the bolt under the seat (by your leg when sitting) in the foot well after a ride. I decided to check the others and some were loose. I decided to purchase some washers to protect the plastic (some of the bolts had washers, others didn't). I unscrewed each in turn, added a washer (as per red arrow in the picture) and put some "locktight lock and seal" on each bolt before replacing. An alternative would have been to replace the nuts with 'locking nuts'.
One of the screws holding the trim together was missing on delivery. There was no danger of the trim moving and the screw appeared to be cosmetic (although if others fell off there could have been an issue). The screw in the picture is stainless steel self-tapping screw, size 6 (3.5mm diameter, 12 mm length) flange (domed) and A2 grade which is steel. A4 is marine grade, better but probably un-necessary. Available from ebay.
If you lose one of these trim screws you need a stainless steel self-tapping screw, size 6 (3.5mm diameter, 12 mm length) countersunk and A2 grade which is steel. A4 is marine grade, better but probably un-necessary. They are available on ebay.


Oil change on your scooter

Service a neco abruzzi scooter - preparation
I then realised that it was going to be difficult to find anywhere for a routine service and general maintenance so decided I would have to do it myself. Several online reviews and blogs suggest the bike is far easier to maintain than a classic Vespa or similar; this may be true but the bike still requires two engine and gearbox oil changes in the first 600 miles and the debris that came out with the oil suggests frequent oil changes early on is a wise course of action! With careful planning and some online research I worked out how to change the gearbox and engine oil. Most important is to get everything together. Newspaper to keep any stray oil off your road / drive, latex gloves, paper towels etc. and of course the correct spanners. I cut a large hole in an old windscreen washer container for the oil to drain into. This has the advantage of a spout and lid and the used oil can therefore be easily poured into a suitable container (I used an old plastic milk carton) for proper disposal at your local re-cycling depot.


Changing the gear oil on a Neco Abruzzi

Service a neco abruzzi scooter - gear oil change
The handbook1 suggests SAE 85W 90SF oil. This is very difficult to get and appears to be for marine use; most scooters appear to use "80W 90 (GL4)"; I use a good quality Castrol oil but frequent changes are more important than the manufacturer. The manual1 specifies changing the gearbox oil after 300km, 1000km and every further 1000km. The manual1 does not state the capacity of the automatic gearbox however from experience it is a fraction under 100 ml; the oil in the picture will therefore give ten changes and this is the most economical way of buying it. The container has a nozzle of sorts but I recommend using a 100 ml syringe (from ebay) as in the picture. You can also purchase 100 or 125 ml tubes of oil; these are easy to use and have good nozzles. A single tube is about the same price as a litre so this is an expensive way of buying oil!

1. Neco Abruzzi Owner's Manual, version 1.02, March 2012
Service a neco abruzzi scooter - gearbox oil change
The manual1 has the following instructions:
(1) Put the scooter on the centre stand [on level ground]
(2) Place an oil pan under the gear case [see my picture]
(3) Remove the oil filler bolt and the drain plug to drain the oil [I would leave the filler bolt in place until needed to avoid the risk of getting debris in the gearbox]
(4) Reinstall and tighten the drain plug
(5) Fill the gear case with oil
(6) Reinstall the oil filler bolt
(7) After replacing the gear oil be sure to check for oil leakage
The exit and entry points are well hidden and not described! Put a collecting tray under the bike as in the photo above and remove the nut by my finger (partly loose in the photo). Once the old oil has drained out, clean and replace the nut.
Service a neco abruzzi scooter - gear oil change
Now re-fill with oil. Again, the entry point is camouflaged as a nut marked in the picture to the left. Be careful to avoid getting muck or grit near the tube or syringe. If you've slightly overfilled it, let any excess oil drain into the collecting container. Be careful to avoid oil on the wheels and brakes. And don't forget, the bike needs a short run to warm up the oil first. Make sure it is secure on its centre stand before you begin. Oil is toxic and nasty stuff; never tip it down a drain! Take it for proper disposal to your local re-cycling center.


Changing the engine oil on a Neco Abruzzi

Service a neco abruzzi scooter
Now for the engine oil. I used "Castrol GTX 15 40 oil" A funnel with a long spout is needed as it's awkward trying to get to the filling hole. I now have a large 5 L can of oil which I decant into the smaller oil container (shown) to get the correct quantity.
Service a neco abruzzi scooter - engine oil change
The engine oil process is described in the manual1 except that the translation must have gone awry and it tells you to fill it at the bottom and empty at the top, somehow defying gravity. I used the more conventional approach which seemed to work! The oil is emptied by undoing the nut marked by the red arrow. Oil is inserted in the dip stick hole (just visible to the top left of the photo). Getting engine oil into the bike is awkward and will require a funnel with a long nozzle as in the picture above. The manual1 states 800 ml however this overfilled my 50cc scooter and I now use 700 to 750 ml. The handbook1 states the 125cc version has the same oil capacity.

1. Neco Abruzzi Owner's Manual, version 1.02, March 2012


Changing a headlamp bulb on a Neco Abruzzi

Service a neco abruzzi scooter
Headlamp bulbs can have a lifetime of just 300 hours. As I always ride with my headlamp on, the bulb is only going to last a few months. I don't ride much in the dark but thought I'd buy a spare bulb in case it did fail at a bad time. What I learnt was that it would be very tricky to change the bulb in the dark even with someone holding a torch. However I have purchased a spare bulb in case. The sealed unit specifies an S2, 12v 35w/35w (in other words both dipped and main beam are 35 watts).
Service a neco abruzzi scooter - headlamp bulb
The plastic on the bike is quite soft (especially the 'chrome') so it's good to know how the sections come apart. There's nothing in the manual so I made a few mistakes for myself and the bike has a few minor dents as a result. I had assumed I needed to unscrew the chrome around the front of the headlamp and the sealed unit would come out. The screws were easy however this isn't the way in (however they do need removing in any case). I tried to gently force the chrome loose. However the correct procedure is to remove the top plastic section (with the speedometer etc. attached). This is removed with four screws marked with 'A' on the photos. I've only marked two, one from the front and one from the well of the bike; there are two more on the other side. Incidentally screw 'B' is used to set the headlight beam angle; if your headlight is blinding other road users, this screw will allow you to set it correctly.
Service a neco abruzzi scooter - wiring loom
With the four screws removed (plus the two holding the headlamp chrome) the top plastic section can be lifted as in the picture left. Be careful as the wiring loom is connected to the instrument cluster on the plastic panel being removed.
Service a neco abruzzi scooter - instrument cluster inspection
There is a rubber cap to keep the damp away from the bulb contacts. This needs gently pulling away from the headlamp assembly and the new headlamp (or parking lamp) can be replaced. Be careful when re-assembling the plastic sections not to snag any of the wires.


Changing a number plate bulb on a Neco Abruzzi

Change licence plate bulb on a neco abruzzi scooter Service a neco abruzzi scooter - tail light lamp replacement Service a neco abruzzi scooter - bulb replacement tail light
The rear running and brake lights are LEDs and so should hopefully outlive the bike. The number plate bulb may need changing. Mine was looking 'dark' after 2,500 miles so I decided to replace it with an LED bulb available from Ebay. To get at the bulb, the entire rear lighting assembly needs removing from the bike. There are three bolts that need removing from behind (you can get at these under the wheel). A size 10 spanner is required.
Carefully pull the light assembly from the bike; carefully feed through the wires from behind; try not to stretch or pull these - not as easy as it sounds. There are then four screws that need unscrewing (marked in red in the picture).
I couldn't get the camera for the final two crews but they should be evident if awkward to get at; they release the clear plastic cover.

Service a neco abruzzi scooter - number/license plate light fitting
The bulb is released by pulling gently.
neco abruzzi scooter - 12v wedge 5w bulb wedge type
Replace with a 'wedge' type bulb, 12 volt, 5 Watt. Screw the cover back on being careful to ensure the small rubber seal is in place. Screw back the four screws. If the main rubber seal has come loose, re-fix it to the light assembly. This can be tricky - ensure the rubber tabs are inserted in the slots. Now fix back using the three bolts; you may want to clean the plastic first as it's likely to be muddy.


Change speedometer / odometer to miles per hour (MPH)

The speedo on my bike was delivered set to kilometers per hour (kph). From emails received I believe this is quite common although the distributor has told me the dealer should set this to miles for use in the UK. However it's relatively easy to do it yourself. First remove the instrument cluster (see the section above on changing a headlight for instructions on how to do this). On the rear of the display is a rubber grommet (see picture). Carefully remove this with an awl or small screwdriver. Now turn on the ignition and with something pointed (an awl) gently push the button (like a reset button) behind the grommet. The display should now read MPH / miles. Press again should you want it back in kilometers. Replace the rubber grommet, and replace the plastic parts as above.
Service a neco abruzzi scooter - convert to MPH


Riding in winter - heated grips

Neco Abruzzi with the spare wheel removed
With warm clothing, I'm enjoying the bike in the colder weather. My fingers were getting cold so I fitted some heated grips. Oxford have a product that can be removed in Summer so I tried these. Despite the claims, they took 2 hours to install. The cable to the battery only just reaches. I fed it down the steering column (with the brake cables). You may need to remove the 'spare wheel' (which reveals a plate, see picture) which allows access to feed the cable down. The spare wheel and plate are removed with the allen key provided with the bike's toolkit. I unscrewed the cover under the bike (the black plastic) which is fixed with a few screws. I then fed the cable along the chassis and up to the battery. The electrical connectors at either end would not fit through this route so I had to splice and re-join the cable. I suggest you do this near the fuse. The grips are fixed with velcro and can be removed in summer (with the cables fed into the steering column to keep them out of the way). Even through leather motorcycle gloves, it now feels warm. With the headlight and heaters on, the battery just stays at full charge with my 50 cc bike 'flat out'. I would anticipate the battery may become discharged with lots of stop / start riding with the engine idling.


Cleaning and polishing the scooter

As with all new toys, I was keen to see my new bike clean and shiny. Standard car shampoo applied with a soft sponge or cloth is ideal. I bought a tin of Simonize wax only to read it is not suitable on plastic. Research suggested this meant matte plastic and shiny is ok; it didn't seem to do the plastic any harm, however I later read that showrooms simply use furniture polish. I tried this and it brings the bike to a fantastic shine with little effort and will apparently help protect the bike from ultra-violet (UV) light.


MOT testing

After three years my bike needed an MOT. I imagined that most garages would not be interested in inspecting a NECO scooter (or any Chineese scooter for that matter) and I was right. However all the garages I tried did suggest specialist garages, generally some distance away which was not ideal, especially in the depths of winter. In the end I was lucky as a small company with many years experience has moved to new premises near me. If they had been there when I bought the bike I might never have written this blog as I'd probably have taken the easier option and let a mechanic do the maintenance! The moral is to try a few local garages in the hope that they will point you in the direction of a specialist approved MOT testing centre. If you live in mid-Sussex near Henfield, I can recommend the local firm I found, Boretech Engineering. From the waiting room you can see what's going on through a large viewing window and it is now reassuring to know the bike is totally sound. It passed first time by the way!'


User manual

I've had many emails asking for a scan of the user manual. It's not especially high quality but click on the image for a download. See also the sections above for information on a couple of errors in the manual.
NECO Abruzzi owners manual


Neco Abruzzi sport Neco Abruzzi 007 special edition

Back to main Neco Abruzzi page

Around Sussex on a retro 1960s Scooter

My best photography Click here to visit Amberley in Autumn Click here to visit the preserved Kent & East Sussex Railway Blackgang garden light railway
Invectis websites
Email: Dave Parker


© 2012-2018, Dave Parker